
Fixing a running toilet really is as simple as it sounds, you just need to figure out the right cause first. A lot of people treat it like some technical nightmare and go straight to hunting down a plumber. But this guide isn’t just going to help you understand the problem, it’s going to walk you through fixing it right the first time.
This is a problem every single household runs into. Honestly, at least once a year, some toilet in the house starts running. Most of the time you don’t even notice water is leaking until the bill shows up way higher than usual. Even a minor leak can waste over 6,000 gallons a month, which can add hundreds of dirhams to your annual water bill.
The good news is, this almost always comes down to just three or four parts: the flapper, the chain, the fill tube, or the fill valve and float. But knowing the names of these parts isn’t enough on its own, the real fix comes from understanding how they actually work together. Every pattern of “running” points to a different cause. Below, we’re covering something most guides skip entirely: figure out your exact symptom first, then go straight to the fix.
Figure Out Your Symptom First
Here we’ll first figure out how your toilet is actually running, then fix that specific part.
- Constant hissing that never stops: The flapper isn’t sealing, or the fill valve isn’t shutting off.
- Runs on its own for a few seconds every 5–10 minutes: A slow leak past the flapper.
- Only noticeable at night or when the house is quiet: Same slow flapper leak, it’s just more obvious once the noise around you dies down.
- You have to jiggle the handle to get it to stop: The chain is loose or tangled.
- A faint gurgling from the overflow tube: The fill tube is sitting too low in the water.
- Water visibly above the overflow tube: The float is set too high.
Step One: Confirm It With a Dye Test
Before you touch anything, do this quick two-minute test. It’ll save you time and help you actually pin down the problem instead of guessing.
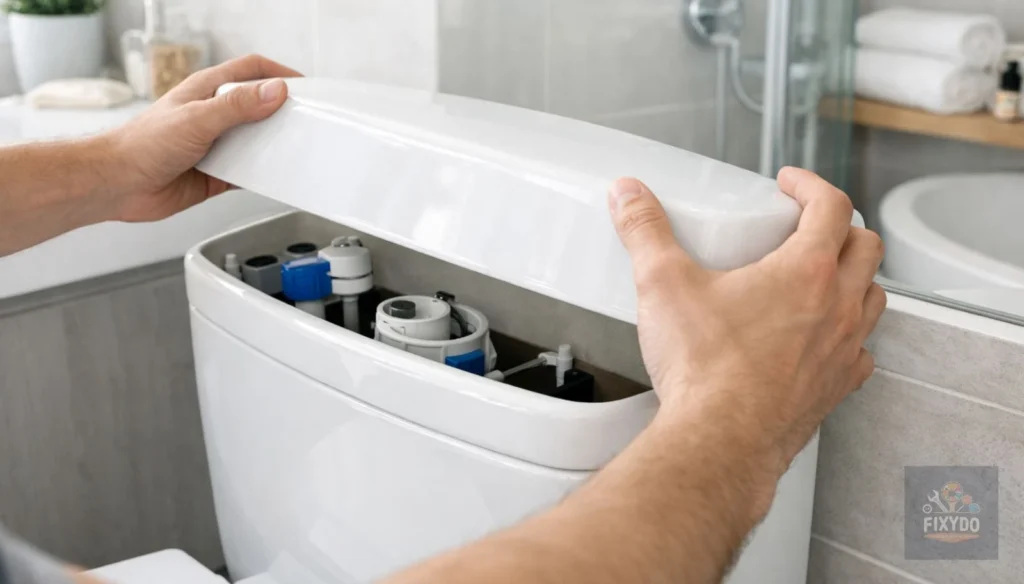
- Lift the tank lid.
- Add 6–8 drops of food coloring to the water. Don’t flush.
- Wait 15–20 minutes.
- Check the bowl.
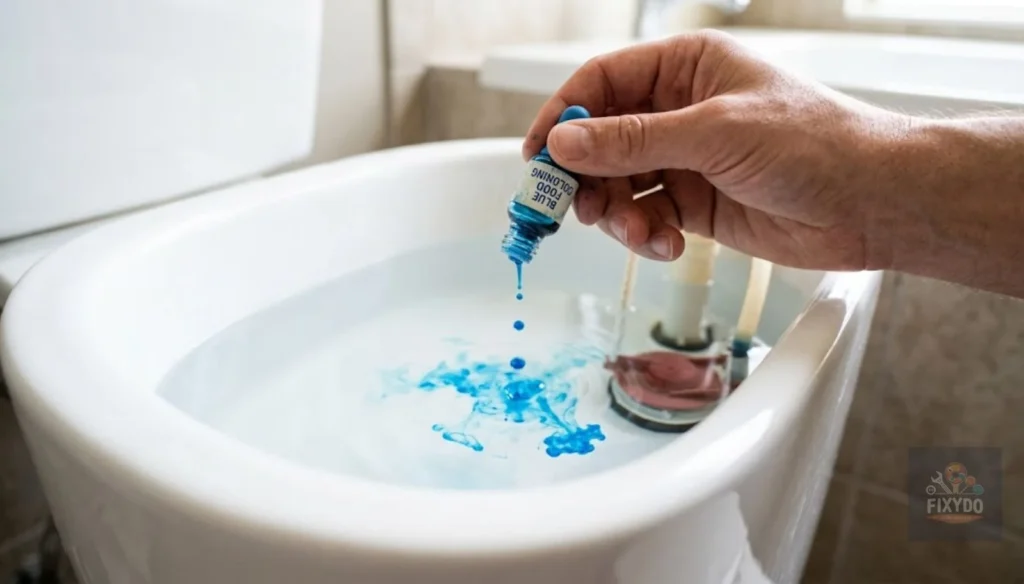
If colored water shows up in the bowl, it means the flapper isn’t sealing properly; this is the most common reason a toilet runs. If there’s no color, the issue is probably with the fill valve or float instead.
Check the Water Pressure Before You Start
This step matters, and it’ll get you to the right answer faster. It’s also the one people forget most, so make a point of checking it. There’s a small valve on the wall or floor behind the toilet where the water comes in.
Turn that valve fully counterclockwise so the pressure is at full strength. A valve that’s only half open can feel exactly like a broken fill valve, so it’s worth ruling this out first.
1. Check the Flapper and Chain
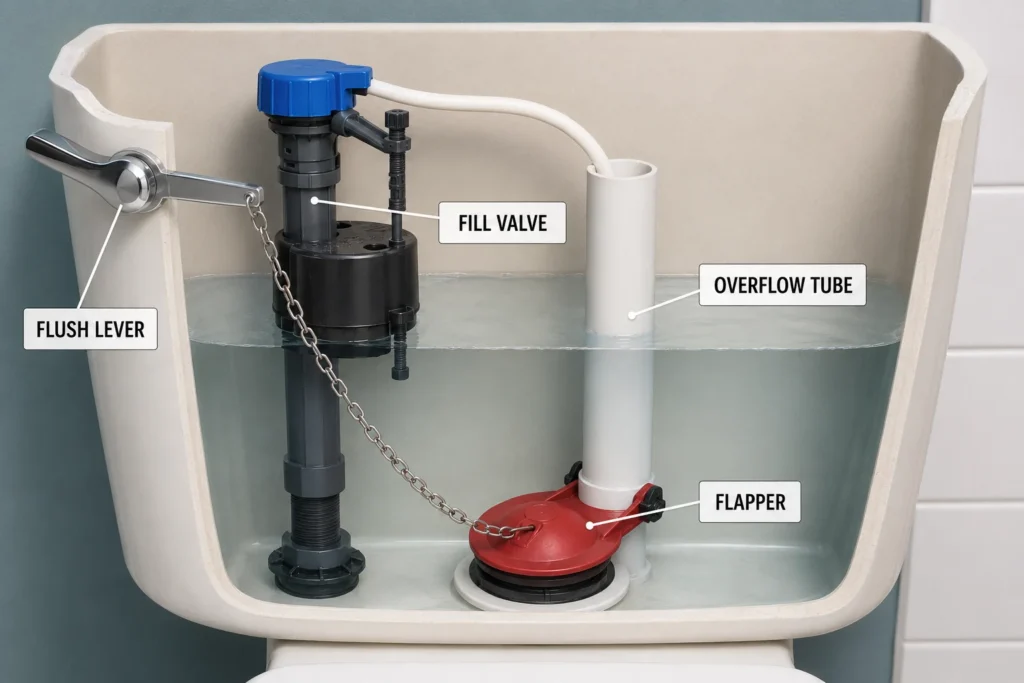
Open the tank and look at the chain connecting the flapper to the flush mechanism. The flapper is the rubber stopper that lifts during a flush, letting water rush from the tank into the bowl, then drops back down to reseal the tank.
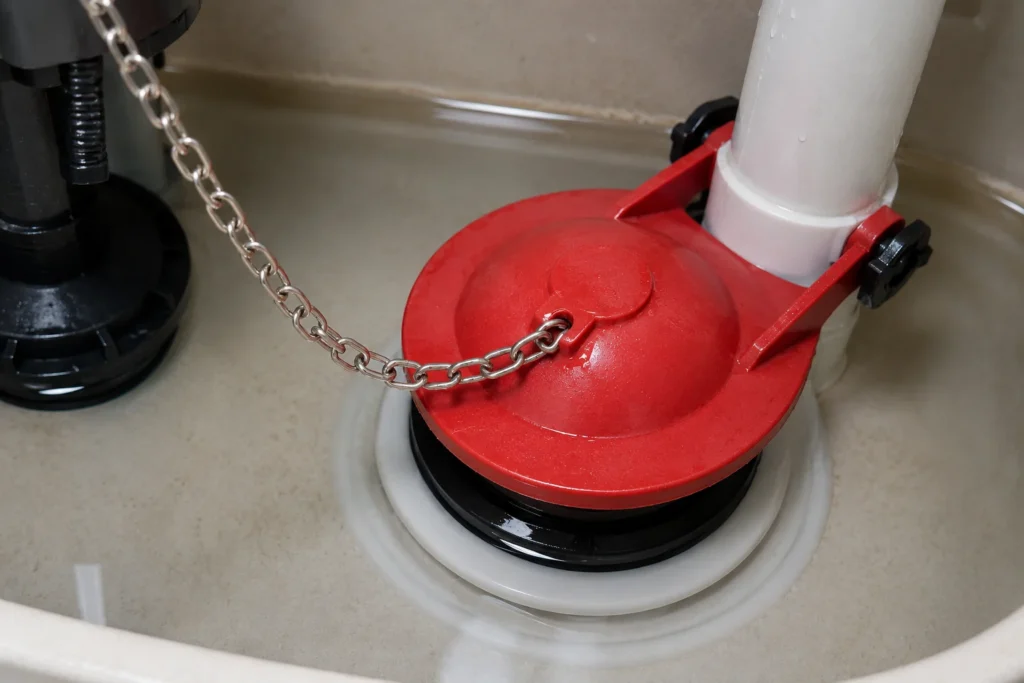
This part is behind most running-toilet complaints, especially that “phantom flush” pattern where the toilet tops itself up every few minutes on its own. That happens because the fill valve keeps replacing water that’s slowly leaking past the flapper.
- If the chain has too much slack, the extra length can get caught under the flapper and stop it from sealing properly. Tighten it just enough to remove that slack. But don’t tighten it too much, or the flapper won’t be able to close completely.
- Getting the tension right sometimes takes a bit of trial and error. You’re aiming for roughly half an inch of slack once the flapper is closed.
If adjusting the chain doesn’t fix it, check the flapper itself. Press it between your fingers, it should feel soft and flexible. If it feels stiff, warped, or slimy, it’s simply worn out. Rubber degrades on its own over time, even if it still looks fine on the surface.
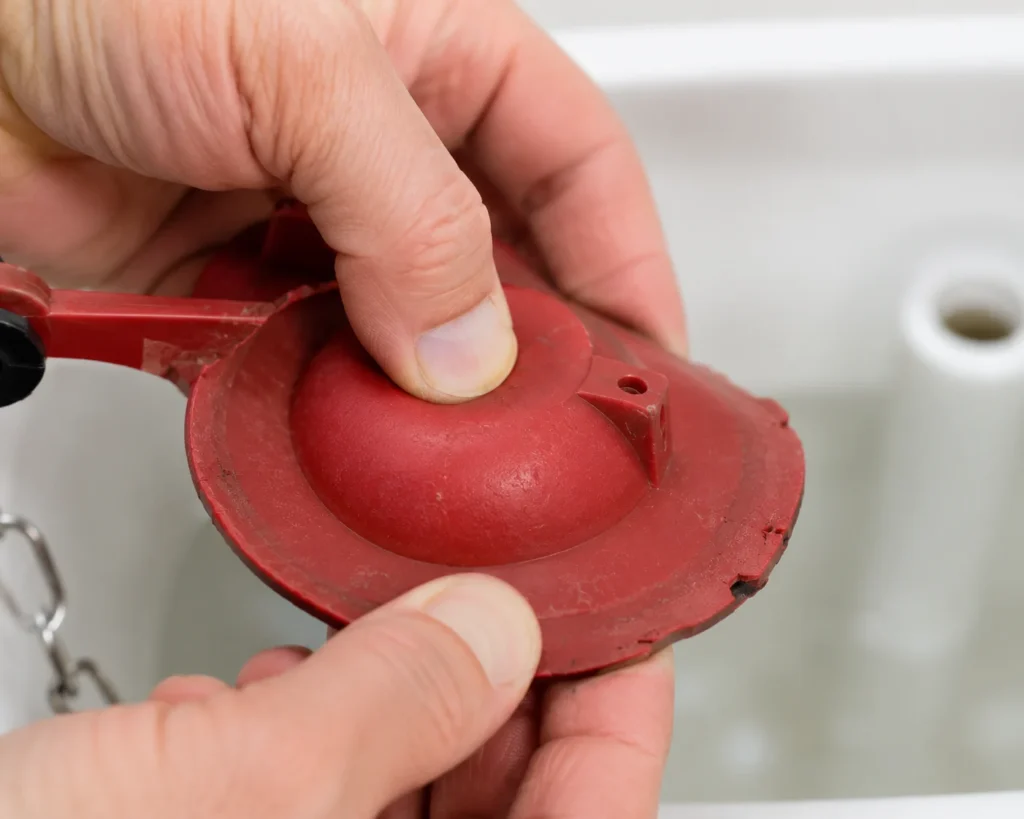
How to install a new flapper:
- Shut off the water supply and flush to drain the tank.
- Detach the chain from the flush arm.
- Slide the old flapper off the two “ears” on the overflow tube.
- Bring the old flapper with you to the hardware store so the size matches (2-inch and 3-inch are the most common).
- Fit the new flapper, reconnect the chain with about half an inch of slack, and turn the water back on.
(Note: If the handle stays stuck down after flushing, the lever mechanism itself may have broken. In that case, you’ll need to replace the whole lever.)
2. Check the Fill Tube
The fill tube is a small plastic pipe that connects the fill valve to the overflow pipe. It refills the toilet bowl after you flush. If the end of this tube is underwater, it can suck the water out and keep draining the tank. When this happens, you’ll usually hear a soft gurgling sound instead of a hissing noise.
Fix: Trim the tube (or just reposition the clip) so the end sits above the waterline and rests on the rim of the overflow tube instead of down inside it. Takes less than two minutes and costs nothing.
3. Inspect the Fill Valve and Float
Older toilets use a ball float attached to a metal arm connected to the fill valve. If the ball sits too high, water spills over the overflow tube and the tank never really stops filling. The quick fix is to bend the arm down slightly, or turn the adjustment screw on the fill valve clockwise to lower the water level.
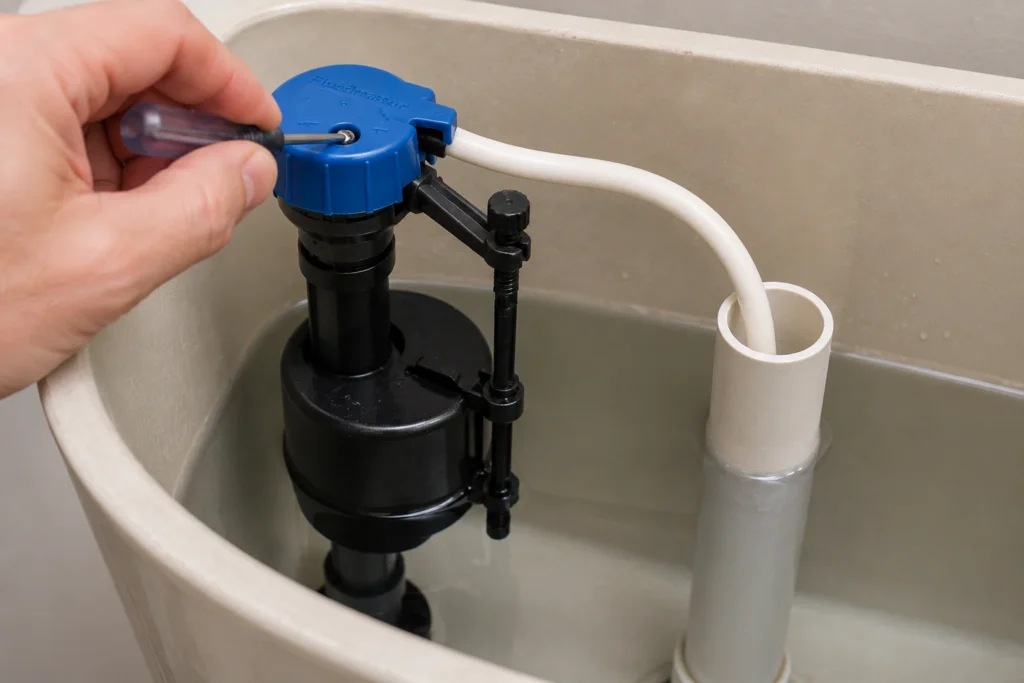
Newer toilets usually build the float right into the fill valve, shaped like a cup or cylinder. On these, squeeze the clip on the side of the float to slide it up or down, or turn the adjustment screw on top. You’re aiming for a water level that sits about half an inch to an inch below the top of the overflow tube.
If the water keeps running after you adjust the float, dirt might be stuck in the valve. This happens a lot with hard water. To clean it: turn off the water, take off the cap, and turn the water on full blast for a moment to wash the dirt out.
If cleaning doesn’t solve it, you’ll need to replace the fill valve:
- Shut off the water supply.
- Flush to drain the tank, then disconnect the water supply line from underneath the tank.
- Unscrew the locking nut and remove the old valve.
- Take the old valve to the hardware store to get the right replacement.
- Install the new valve at the same height following the manufacturer’s instructions, and set the float to the correct water level.
4. If It’s Still Running: Less Common Causes
If you’ve already replaced both the flapper and the fill valve and the toilet is still running, check these:
- The flush valve seat might be damaged: The flapper seals against this ring, not just against its own shape. Run your finger around it; if it feels rough or pitted, even a brand-new flapper won’t ever seal completely. Minor damage can sometimes be smoothed out with fine sandpaper; anything worse means replacing the entire flush valve assembly.
- The overflow tube might be cracked: Even with everything else working fine, water will keep trickling into the bowl. Replacing the flapper won’t fix this, the whole assembly needs to be swapped out.
- Mineral buildup could be the culprit: Hard water leaves deposits on the flapper and valve seat that stop the seal from sitting flush. Clean both parts with vinegar and a soft brush.
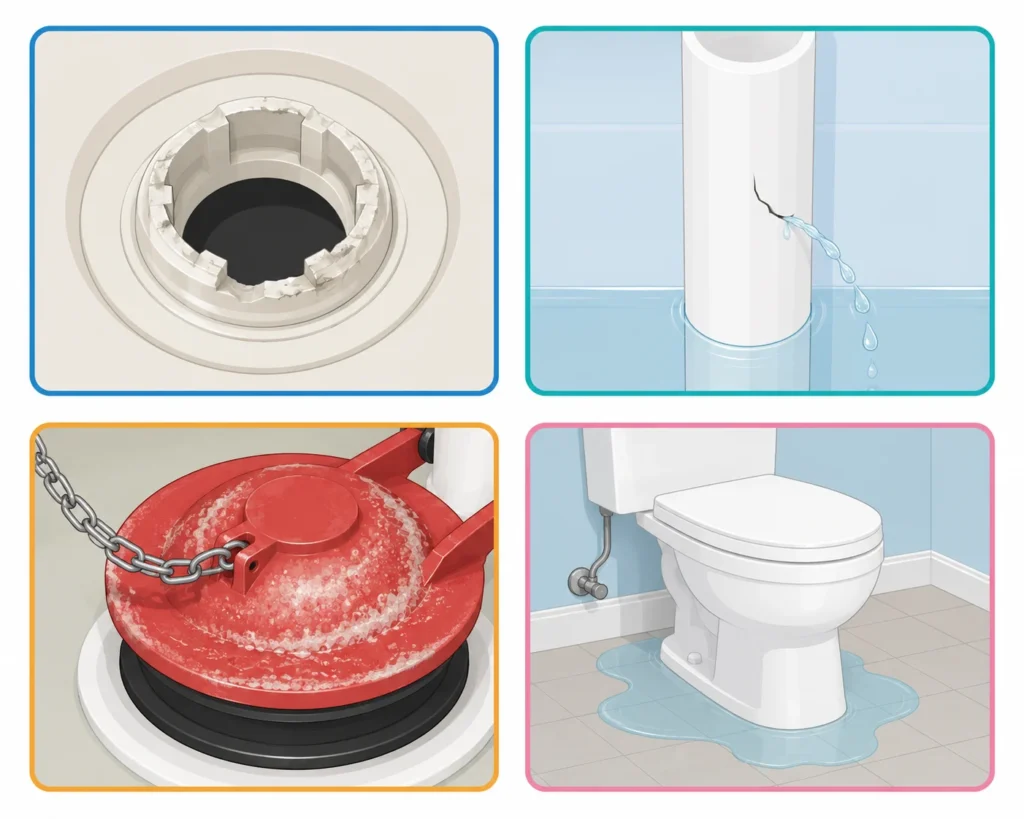
Keep in mind that if none of this solves it, there could be a pipe leak somewhere else. It’s worth checking your walls and the tank itself to trace where the leak is actually coming from.
Cost: DIY or Plumber in UAE
Most people want to know how much they’re actually saving by doing this themselves. At Fixydo, a plumber can give you solid advice if you ask, but here’s a rough cost breakdown either way:
| Job | DIY Cost (Parts Only) | Plumber Cost (Labor + Parts) |
|---|---|---|
| Replacing a flapper | 20–60 AED (15 mins) | 150–250 AED |
| Replacing a fill valve | 40–100 AED (20 mins) | 200–350 AED |
| Fixing the valve seat | 60–150 AED (45–60 mins) | 300–500 AED |
| Diagnosing the issue | Free (Dye test) | 100–200 AED (Inspection fee) |
If the toilet is still running after replacing both the flapper and fill valve, or if you notice a crack in the tank or bowl, or water marks on the wall or floor, it’s time to call a plumber.
A Few Tips to Avoid This in the Future
- Check the rubber on your flapper every 6 to 12 months. Press on it to see if it still feels right and holds up under pressure.
- Don’t drop bleach or in-tank cleaning tablets into the tank. A lot of people do this for cleaning, but it wears down the rubber much faster.
- If you’re in an area with hard water, run the dye test twice a year.
Frequently Asked Questions
Why is my toilet running even though I haven’t touched anything?
This usually happens because the flapper isn’t sealing properly. Water slowly leaks from the tank into the bowl, and the fill valve keeps kicking on to top it back up.
Why does my toilet only run at night?
It’s not actually only running at night, the leak is constant. It’s just far more noticeable once the house goes quiet, as mentioned above. Run the dye test to confirm it.
Is it harmful to just leave a running toilet alone?
It won’t damage your plumbing right away, but you’ll waste thousands of gallons a month. Over time, that constant flow wears down the flapper, valve seat, and fill valve faster, which can turn a small, cheap fix into a much bigger repair.
How much water does a running toilet actually waste?
Even a minor leak can waste around 200 gallons a day. If the flapper has failed completely and water is running continuously, it can be even more than that.
Can I get this fixed for free?
If nothing’s actually broken, you can fix it yourself—things like adjusting the chain, for instance. But if it turns out to be a bigger issue, you can get free help on Fixydo. Just post your problem there.
Most running toilets ultimately come down to two cheap parts: the flapper and the fill valve. Identify the symptom, run the dye test, and follow the right steps, and there’s a good chance your toilet will be quiet again before your tea even gets cold.