
That drip-drip-drip at 2 a.m. isn’t just annoying; it’s money going straight down the drain. A shower head that leaks even a little can waste over a thousand gallons of water a year. The good news? Most of the time, the fix takes less than twenty minutes and costs under ten dollars in parts.
Before you call a plumber, run through this guide. We’ll walk you through figuring out exactly why your shower head is leaking, and then give you the specific fix for each cause — whether that’s a loose connection, a worn-out washer, or a worn valve inside your wall.
First, Make Sure It’s Actually a Leak
A few drops after you turn the shower off is completely normal. Water sits in the pipe and the shower head, and gravity does the rest. That’s not a leak, that’s just physics.
A real leak looks different. You’ll notice:
- Water dripping steadily even hours after you’ve shut the tap off.
- Water spraying or dripping from the connection point (where the head meets the metal arm) while the shower is running.
- A puddle constantly forming under the shower head between uses.
- Rising water bills with no obvious explanation.
If any of that sounds familiar, keep reading.
Figure Out Which Kind of Leak You Have
This is the step most guides skip, but it’s the one that actually saves you time. Where the water is coming from tells you exactly what’s broken.
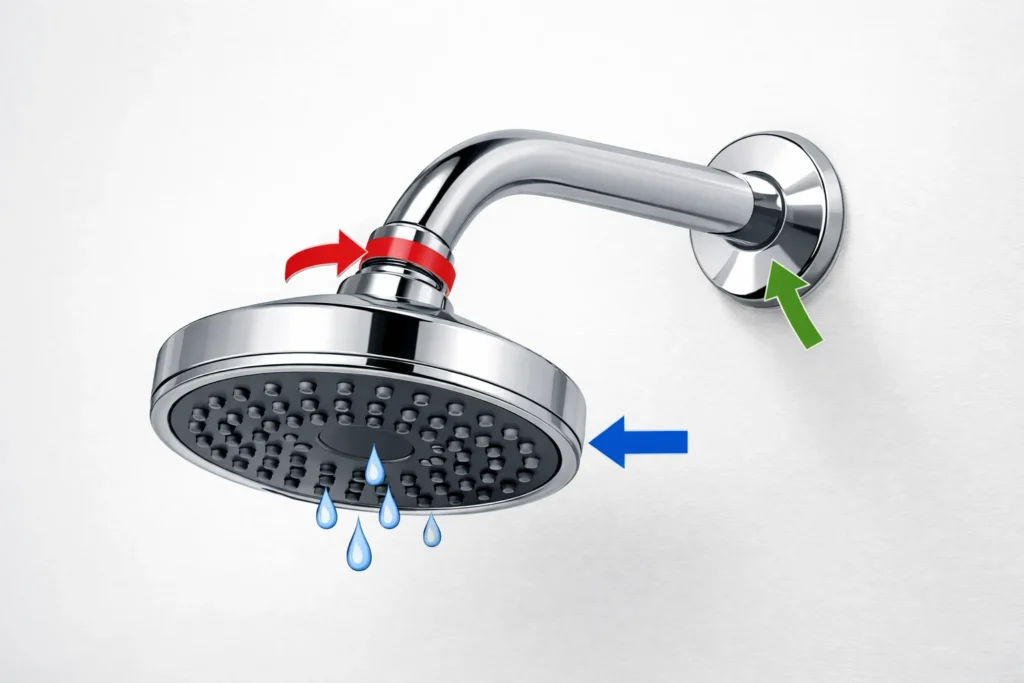
- Leaking while the water is running, from the connection where the head screws onto the arm → This is usually a loose fitting, a worn washer, or old plumber’s tape. Go to Fix 1, 2, or 4.
- Leaking from the shower head itself even after the water is completely off → Plumber’s Secret: This is not a shower head problem. The shower head doesn’t hold back water; the valve does. If water is dripping when the tap is off, you have a faulty diverter or cartridge inside the wall. Skip straight to Fix 6.
- Water leaking from the wall behind the shower, or a damp/soft patch on the wall or ceiling below the bathroom → This is a hidden pipe issue behind the tile. Skip to Fix 7 and don’t try to DIY this one.
What You’ll Need
You probably already have most of this lying around:
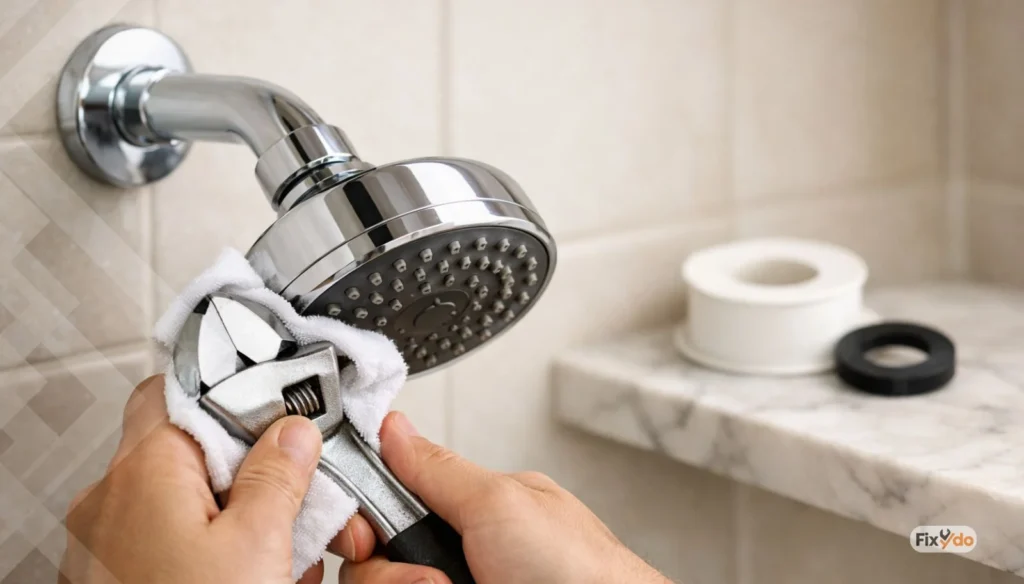
- Strap wrench (ideal for not scratching finishes) OR an adjustable wrench/channel-lock pliers.
- PTFE tape (plumber’s tape) — a few dollars at any hardware store.
- Replacement rubber washer or O-ring (bring the old one to the store so you match the size).
- White vinegar and an old toothbrush or small brush.
- A rag or old towel, to protect the finish if you aren’t using a strap wrench.
- A small plastic bag (optional, for the vinegar soak).
- Safety glasses: To protect your eyes from falling rust, mineral scale, or debris when working directly under the shower pipe.
Total cost if you’re buying everything from scratch: Usually $10 – $15.
Fix 1: Tighten the Shower Head Connection
This is the most common cause for leaks while the shower is running, and it’s the first thing to check.
- Turn off the shower tap.
- Always try hand-tightening first. Most modern shower heads are made of plastic with a chrome finish.
- If it’s still loose, use a strap wrench for a safe grip. If using a standard wrench, wrap a rag around the connection nut so you don’t scratch the finish, then give it a gentle quarter-turn clockwise. Do not overtighten — cranking it too hard will easily crack plastic threads.
- Turn the water back on and check. If the drip is gone, you’re done. If it’s still leaking, the washer inside is probably worn out — move to Fix 2.
Fix 2: Replace the Washer or O-Ring
Almost every shower head has a small rubber washer or O-ring sitting right at the connection point. Over time, hot water causes it to harden, crack, or flatten out. This is usually the actual culprit when tightening alone doesn’t stop the leak.
- Unscrew the shower head from the arm by hand (or gently with your wrench).
- Look inside the head where it connects — you’ll see a small rubber ring sitting in a groove.
- Pop it out with a flathead screwdriver or your fingernail.
- Take it to a hardware store to match the size, or buy a multi-size washer kit.
- Push the new washer into the groove, screw the head back on by hand until snug, then give it a quarter-turn with the wrench.
Fix 3: Clean Out Mineral Buildup
Note: Mineral buildup won’t cause a continuous leak when the tap is off, but it can cause water to spray out of the sides of the connection or make the head “weep” water for a long time after your shower.
- Unscrew the shower head. If it’s fixed in place, fill a plastic sandwich bag with white vinegar and secure it around the head with a rubber band so it is fully submerged.
- Let it soak for 30–60 minutes (overnight if it’s badly clogged).
- Scrub the nozzle holes gently with an old toothbrush.
- Rinse thoroughly and reattach.
Fix 4: Reapply Plumber’s Tape
If you’ve already checked the washer and it’s fine, the seal between the shower arm’s threads and the head might just need fresh tape. Old tape gets compressed and stops sealing properly.
- Unscrew the head from the arm.
- Peel off any old tape residue from the arm’s threads.
- Wrap new PTFE tape clockwise (when facing the open end of the threaded pipe). This direction is crucial — wrapping it anti-clockwise will cause the tape to unwind as you screw the head back on. Wrap it about 3–4 times around.
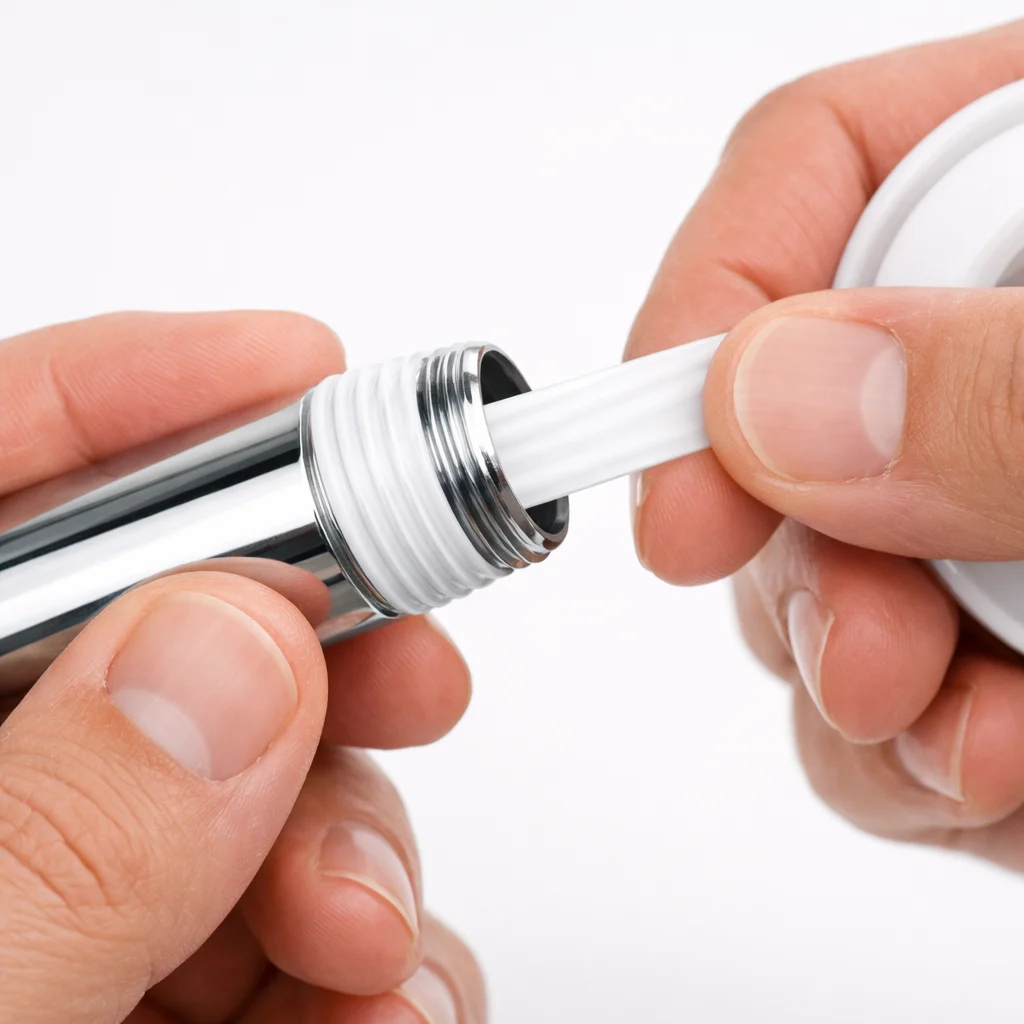
Pro Tip: Pull the tape slightly tight as you wrap it so it sinks into the threads. This creates a much better seal. Leave the very first thread bare. If tape overhangs the edge, small pieces can break off inside the pipe and permanently clog your shower head nozzles.
- Screw the shower head back on by hand, then snug it with the wrench.
Fix 5: Fix a Leaking Shower Arm
Sometimes the leak isn’t at the head at all — it’s where the metal arm meets the wall. If you see water dripping from that joint while the shower is on:
- Check whether the arm itself is loose in the wall fitting. If so, tighten it gently. (Pro Tip: If it won’t budge by hand, wrap a thick rag around the arm before using pliers or a strap wrench to prevent scratching the chrome finish).
- If it’s still leaking, unscrew the entire arm from the wall, clean the threads, and reapply plumber’s tape the same way as Fix 4.
⚠️ WARNING: If the shower arm is extremely tight and won’t unscrew, do not force it. If you break the pipe fitting inside the wall (the drop-ear elbow), you will have to break the tile to fix it. Call a plumber if it’s stuck.
If water is coming from behind the wall plate itself (the escutcheon), that’s usually a sign of a bigger problem behind the tile — see Fix 7
Fix 6: A Leaking Valve or Cartridge (When Water Drips While Turned Off)
If water keeps dripping from the shower head even when the taps are fully closed, your shower head is fine. The problem is a worn-out valve cartridge or rubber seat inside the wall that is failing to hold the water back.
⚠️ WARNING: Before you attempt this, you MUST turn off the water supply. If you unscrew a valve with the water on, you will flood your bathroom.
Fixing this involves:
- Turning off the water supply.
Pro Tip: Before turning off the whole house’s water, check behind the decorative faceplate. Many modern shower valves have “integral stops” (small screws on the left and right of the valve). Turning these clockwise with a flathead screwdriver will shut off the water just to the shower.
After turning off the water, open a lower tap (like a sink or bath spout) to drain the remaining water and release pressure before removing the shower valve.
- Removing the tap handle and decorative faceplate.
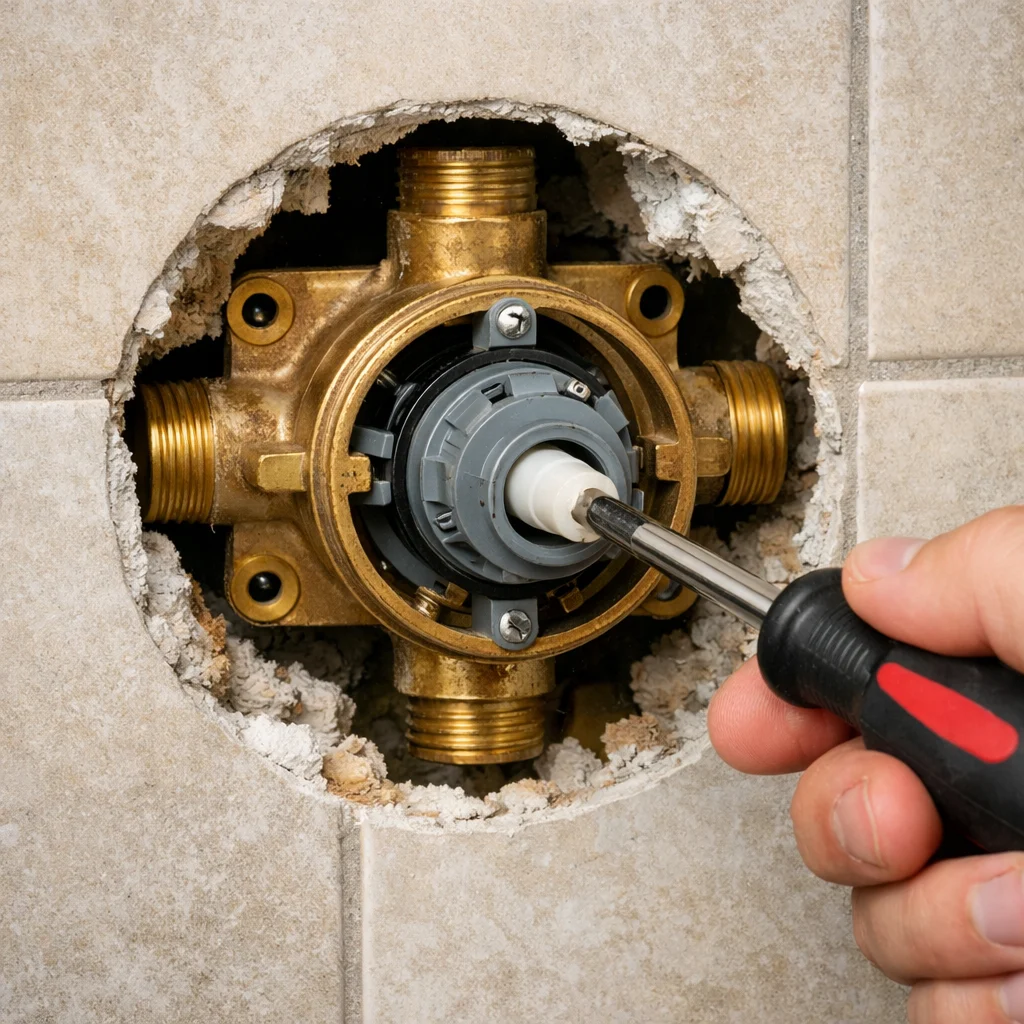
- Pulling out the internal cartridge or valve stem.
Pro Tip: Hard water minerals often cause old cartridges to get stuck. You may need a special, inexpensive tool called a Cartridge Puller. Do not force it out with pliers, or you risk breaking the pipes behind the wall.
- Replacing it with the exact matching part for your tap brand and model.
If you’re not confident taking a plumbing valve apart, this is the perfect time to call a professional.
Fix 7: When It’s Actually a Hidden Pipe Leak
Stop and call a plumber immediately if you notice any of these:
- Damp patches, bubbling paint, or discoloration on a wall or ceiling connected to the shower.
- A musty smell that doesn’t go away.
- Water pooling somewhere that isn’t directly under the shower head.
- A leak that keeps coming back no matter what you fix at the head or arm.
These are signs of a leak behind the tile. Catching it early is a lot cheaper than catching it after it has caused structural water damage.
Repair or Replace?
If you’ve gone through the fixes above and the shower head is old, corroded, or the leak keeps coming back, sometimes it’s just cheaper to replace it outright.
| Action | Typical Cost | Worth it when… |
|---|---|---|
| DIY repair (washer, tape, cleaning) | $5 – $15 | Leak is minor; shower head is relatively new. |
| Full shower head replacement | $20 – $80+ | Head is heavily corroded, cracked, or outdated. |
| Valve/cartridge replacement (DIY parts) | $30 – $100+ | Water drips continuously when the shower is turned off. |
| Professional plumber call-out & repair | $150 – $400+ | Valve is stuck, pipes are leaking behind the wall, or you are uncomfortable with DIY plumbing. |
How to Stop It Happening Again
A few minutes of maintenance now and then saves you from doing this whole process twice:
- Don’t overtighten connections — that stresses the plastic threads and crushes washers, which actually causes leaks over time.
- Wipe down the shower head after use if you have hard water, to slow down mineral buildup.
- Do a vinegar soak every 2–3 months.
- Check the connection point every so often, especially in older bathrooms.
For emergency situtation if you need a emergency plumber in UAE, you should use the Fixydo. First of all, Select the industry “Plumber” > Select your location from dropdown menu > Explore active plumber which have green dot, means is still available.
If you dont know how to get start, read our detailed pages;
- Average Cost of a Plumber in Dubai
- Bathroom Fitting Cost in UAE
- Finding the Best 24/7 Emergency Plumber in Abu Dhabi
FAQs
Why does my shower head still drip after I’ve turned the water off?
A few drops right after your shower is normal residual water draining out. However, a steady, continuous drip hours later means your internal wall valve or cartridge is failing to shut off the water supply. It is not an issue with the shower head itself.
Is a dripping shower head actually a big deal?
Yes, more than people think. A slow, steady drip can waste over a thousand gallons of water a year, spike your water bill, and is often a sign of a failing valve that will eventually get worse.
Can I fix a leaking shower head without calling a plumber?
In most cases, yes. Loose connections, worn washers, old tape, and mineral buildup are all things you can fix yourself in under half an hour. However, valve/cartridge issues and anything involving the pipes inside the wall are better left to a professional if you aren’t experienced.
How much does it cost to fix a leaking shower head?
A basic DIY fix (new washer, tape, or a vinegar clean) usually costs under $15 in parts. A full replacement head runs $20 to $80. If a plumber needs to get involved for a valve replacement, expect to pay anywhere from $150 to $400+ depending on your location and the complexity of the job.
How often should I replace my shower head?
Most shower heads last 6–8 years with normal use, and even longer if you keep on top of cleaning and don’t have very hard water.
Still leaking after trying all of this, or think it might be a hidden pipe issue? Book a local plumber through Fixydo and get it sorted properly the first time.